Last weekend I learned some techniques for making scenery.
Trevor Marshall asked me to visit the TrainmastersTV studios with him so I could participate in his latest "Roadshow" episode. My job was to ask silly questions, and he would show me how easy it was to generate basic grasslands. It was far easier than I expected.
My forte has always been electrical and mechanical aspects of layouts. If you want a pair of .128" diameter holes drilled .750" apart, or you need a wiring harness connecting you control panel to the tracks, I'm your man. But high-school art classes were a long time ago, and I was much better at mechanical draughting than "sketching from life" even then.
Starting with a blank slate (a 12" square slab of extruded foam insulation in this case) Trevor showed me how to add gentle contours, foundation colour & texture, realistic ground cover, and even small shrubs to create a pleasing diorama in just a few hours. The results I achieved were satisfying and visually acceptable; I'm sure with more practise I could improve to the point where I would surprise myself with the finished product.
Trevor has a more complete write-up of the event. Please visit his site for more detailed description.
Showing posts with label scenery. Show all posts
Showing posts with label scenery. Show all posts
5.24.2015

10.16.2008
more dip than a cocktail party
Well, not anymore. With judicious assistance, I finally managed to remove the pronounced dip at one end of the S scale module. Several possible approaches were considered before undertaking the work.
1) lever the extruded styrofoam "bedrock" up from below <- brute force and stupidity
2) hack into the structure sideways at the base of the ballast slope and jam in some shim material <- messy and imprecise
3) strip the rail off the affected area, stack new ties on top of the old, and carefully sand level. <- least destructive and easiest to verify results.
Ultimately choice #3 was pursued. About 2'4" of rail was removed and new sugar-pine ties were glued on with full strength Weld Bond adhesive to fill the depressed area. The opportunity was taken to re-align the rails slightly to eliminate a drunken wander in the main line. 50 grit paper was Super 77 spray adhered to one side of a 4" wide, 2' long, flat plank. 150 grit paper was likewise stuck to the other side of the plank.
The glue was allowed a long cure time before the ties were attacked with the 50 grit until nearly down to the original tie height at both ends. Sanding strokes were made perpendicular to the right-of-way to limit stress on the small gluing surface areas. Frequent checks were made to ensure that the new ties were not getting a crown or being tapered towards one side or the other. Once the old tie colour started to show through the thin skin left by the new ties at the extreme ends of the fill area the 150 grit side was used to clean up and de-fuzz the surfaces.

You can see how pronounced the dip was close to the module end by the rapid increase in fill-in tie thickness. Next the ties were stained with Floquil's "Tie Brown". What remains is the careful replacement of the rails to ensure they meet up with the previously marked positions at the end of the module, and the re-application of ballast around the new ties. A quick trip under the module with a soldering iron will re-attach the buss feeders, and re-testing will be done well in advance of the Christmas Train Show.
Why did the dip appear? Based on the sunken appearance of the ballast along the centreline of the ROW, I can only assume that the eye-dropper application of thinned adhesive was too agressive and the Tentest subroaded contracted as it dried up. This pulled the cork and ties downwards immediately after the end of the trapezoidal pine profile block at the end of the module (which remained flat & level).
Near the siding end of the split-rail fence, a copse of evergreens has sprung up. Short lengths of styrene tubing have been glued into the foam base to ensure rapid installation and removal of the trees for transport. There are twelve MountainView Depot conifers which are a far better looking and more consistently produced than anything I can manufacture.
Here's a product shot from the MountainView Depot gallery:

I'll need more of these, in various sizes, to add depth and texture to the rest of the module. In addition, a good number of flowering shrubs and low scrub will have to be applied to balance the scene.
1) lever the extruded styrofoam "bedrock" up from below <- brute force and stupidity
2) hack into the structure sideways at the base of the ballast slope and jam in some shim material <- messy and imprecise
3) strip the rail off the affected area, stack new ties on top of the old, and carefully sand level. <- least destructive and easiest to verify results.
Ultimately choice #3 was pursued. About 2'4" of rail was removed and new sugar-pine ties were glued on with full strength Weld Bond adhesive to fill the depressed area. The opportunity was taken to re-align the rails slightly to eliminate a drunken wander in the main line. 50 grit paper was Super 77 spray adhered to one side of a 4" wide, 2' long, flat plank. 150 grit paper was likewise stuck to the other side of the plank.
The glue was allowed a long cure time before the ties were attacked with the 50 grit until nearly down to the original tie height at both ends. Sanding strokes were made perpendicular to the right-of-way to limit stress on the small gluing surface areas. Frequent checks were made to ensure that the new ties were not getting a crown or being tapered towards one side or the other. Once the old tie colour started to show through the thin skin left by the new ties at the extreme ends of the fill area the 150 grit side was used to clean up and de-fuzz the surfaces.

You can see how pronounced the dip was close to the module end by the rapid increase in fill-in tie thickness. Next the ties were stained with Floquil's "Tie Brown". What remains is the careful replacement of the rails to ensure they meet up with the previously marked positions at the end of the module, and the re-application of ballast around the new ties. A quick trip under the module with a soldering iron will re-attach the buss feeders, and re-testing will be done well in advance of the Christmas Train Show.
Why did the dip appear? Based on the sunken appearance of the ballast along the centreline of the ROW, I can only assume that the eye-dropper application of thinned adhesive was too agressive and the Tentest subroaded contracted as it dried up. This pulled the cork and ties downwards immediately after the end of the trapezoidal pine profile block at the end of the module (which remained flat & level).
Near the siding end of the split-rail fence, a copse of evergreens has sprung up. Short lengths of styrene tubing have been glued into the foam base to ensure rapid installation and removal of the trees for transport. There are twelve MountainView Depot conifers which are a far better looking and more consistently produced than anything I can manufacture.
Here's a product shot from the MountainView Depot gallery:
I'll need more of these, in various sizes, to add depth and texture to the rest of the module. In addition, a good number of flowering shrubs and low scrub will have to be applied to balance the scene.
4.03.2007
prep for Schomberg
More On30 module progress was achieved during this past weekend. Trackwork was re-checked and yet more spikes were added where necessary. The wye, gorge & curve module sets were connected together, and the fascias were cleaned up & primed.
Once the setup was checked for shorts, the Bachmann Davenport travelled over all the trackwork looking for areas where short-wheelbase locos might encounter problems with electrical pickup. Reversing the engine through the wye was tested several times.
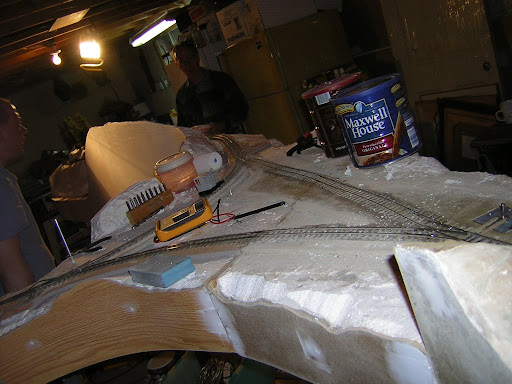
To the best of all of our recollections, the outside-framed consolidation and the C-16 both successfully negotiated the least smoothly aligned leg of the wye (which still needs a short siding installed) during the Christmas Train Show. We have noted, however, that it is unlikely that the Forney or the K-27 will be able to travel over all of the trackwork in its current state.
Scenic treatment prior to the show will consist of mis-tinted acrylic paint covered in sand and/or sanded grout. Some coniferous trees have been purchased from MountainView Depot to "spruce" up the landscape a bit.
We are still debating the final fascia colour. The intent is to provide a surface that will present a uniform appearance, resist fingerprints & other marks, and keep the eye focused on the scene rather than the benchwork. We have it narrowed the choices down to a few very dark tones but are not certain whether a bluish, greenish, or neutral cast will be the best looking in the end.
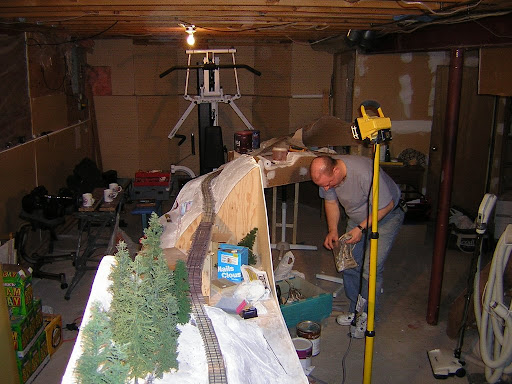
More contour forms, rockwork and trestle bents need to be installed on the gorge set, the loop portion needs additional cleanup, and Whisky Creek definitely requires finishing and a new bridge deck but, we are probably doing OK considering how infrequently we manage to get together for these work sessions.
Once the setup was checked for shorts, the Bachmann Davenport travelled over all the trackwork looking for areas where short-wheelbase locos might encounter problems with electrical pickup. Reversing the engine through the wye was tested several times.
To the best of all of our recollections, the outside-framed consolidation and the C-16 both successfully negotiated the least smoothly aligned leg of the wye (which still needs a short siding installed) during the Christmas Train Show. We have noted, however, that it is unlikely that the Forney or the K-27 will be able to travel over all of the trackwork in its current state.
Scenic treatment prior to the show will consist of mis-tinted acrylic paint covered in sand and/or sanded grout. Some coniferous trees have been purchased from MountainView Depot to "spruce" up the landscape a bit.
We are still debating the final fascia colour. The intent is to provide a surface that will present a uniform appearance, resist fingerprints & other marks, and keep the eye focused on the scene rather than the benchwork. We have it narrowed the choices down to a few very dark tones but are not certain whether a bluish, greenish, or neutral cast will be the best looking in the end.
More contour forms, rockwork and trestle bents need to be installed on the gorge set, the loop portion needs additional cleanup, and Whisky Creek definitely requires finishing and a new bridge deck but, we are probably doing OK considering how infrequently we manage to get together for these work sessions.
Subscribe to:
Posts (Atom)