We're cutting it close. Things are happening on the home front but, as usual, not as quickly or smoothly as we'd like. The process of changing locales must have been deliberately made painful to discourage the average person from confusing civil servants with their whereabouts.
If everything works out according to plan there will be room for a workshop, a large garden, and our endlessly growing library of books. The kitchen is merely adequate as-is, and must be renovated to meet our future needs. If it all happens on time there will be barbeques and a garden party of some sort while the weather is still nice.
First steps will be familiarising ourselves with the perculiarities of the new house, getting used to new traffic patterns, and learning where all the local shops & markets are. A bit of painting & mending will see us through the summer & autumn.
The lot size is ample enough for even a garden railway venture should "planning permission" be given for such a folly. Proportion for native equipment would be 1:19.1 on 32mm gauge track, however, a dual gauge 32/45mm right-of-way would be built in order to accomodate visitors.
Showing posts with label G. Show all posts
Showing posts with label G. Show all posts
5.03.2009

12.09.2007
getting steamed

Over the summer I was able to attend a steam-up at a local enthusiast's home. Wow! There are some seriously interesting live steam engines out there; available either as kits or ready-to-run. The majority of the equipment at the event was 16mm scale (~1:19 proportion) and ran very well, often at surprising velocity.
16mm scale appears to be the ideal scale to pursue construction of the relatively small War Department equipment - a live steam, 2' gauge Baldwin is actually available in this scale (but I didn't dare ask the price).
1.29.2007
1/2"n2 chassis
There is a space 1.74" x 3.48" clear under the tram body to permit the installation of a powered chassis. The only item that can stick up into the "control cabin" on the loco is the electric motor itself. None of the wheels, gears, or sprockets can protude above the floorplate.
The plan is to drive a single rigid axle using a 59:1 Falhauber gearhead motor through a set of 90º helical gears. Ideally, the second tilting axle will be connected to the first using Serv-o-link Delrin sprockets and chain. The helical gears will need to be enclosed in a small gearbox to keep them in proper mesh and reduce any strain on the motor shaft and/or bearings.
Drive wheels should be slightly larger than 14" diameter, but that will depend on the minimum size of sprockets that can be used. Bearing boxes will be hung on the ends of the axles. One set will be fixed, the other will be free to move in their vertical axis.
The plan is to drive a single rigid axle using a 59:1 Falhauber gearhead motor through a set of 90º helical gears. Ideally, the second tilting axle will be connected to the first using Serv-o-link Delrin sprockets and chain. The helical gears will need to be enclosed in a small gearbox to keep them in proper mesh and reduce any strain on the motor shaft and/or bearings.
Drive wheels should be slightly larger than 14" diameter, but that will depend on the minimum size of sprockets that can be used. Bearing boxes will be hung on the ends of the axles. One set will be fixed, the other will be free to move in their vertical axis.
8.05.2006
the LGB Forney project
Some time ago, I was asked if I could narrow an LGB Forney from 45mm gauge to 32mm gauge, in order to better represent the 2' gauge appearance of the prototype. I said yes, but the project languished on my workbench for a lot longer than I ever intended. I did manage to locate a suitable, smaller diameter motor and make measurements (and some plans) for the conversion, but never actually got to it for various reasons.
So this weekend everything came together for a start. I've narrowed both wheelsets on the rear truck to the proper gauge, and am proceeding with the manufacturing of a new truck bolster. Removing 13mm width on the trailing truck and power chassis is going to be a chore; but seeing if the loco manages to walk on it's new "high heels" is going to be something else entirely.
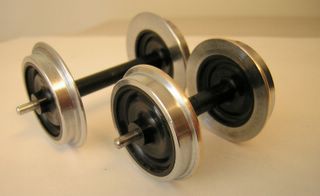
Shown here are one each of the modified and stock wheelsets. Note the flange depth on the narrowed set has been reduced to about .072" from .120".
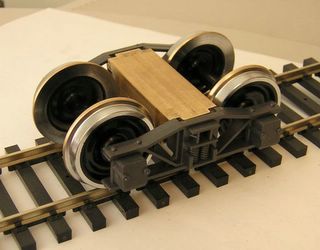
Here is the truck with the new (brass) bolster partially completed. Holes for the sideframe attachment screws and kingpin still need to be drilled at this point.
So this weekend everything came together for a start. I've narrowed both wheelsets on the rear truck to the proper gauge, and am proceeding with the manufacturing of a new truck bolster. Removing 13mm width on the trailing truck and power chassis is going to be a chore; but seeing if the loco manages to walk on it's new "high heels" is going to be something else entirely.
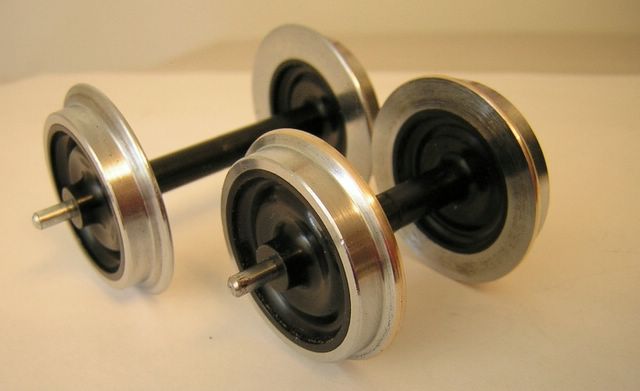
Shown here are one each of the modified and stock wheelsets. Note the flange depth on the narrowed set has been reduced to about .072" from .120".

Here is the truck with the new (brass) bolster partially completed. Holes for the sideframe attachment screws and kingpin still need to be drilled at this point.
6.30.2005
1/2"n2
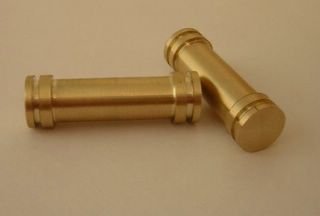
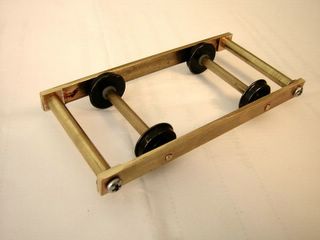
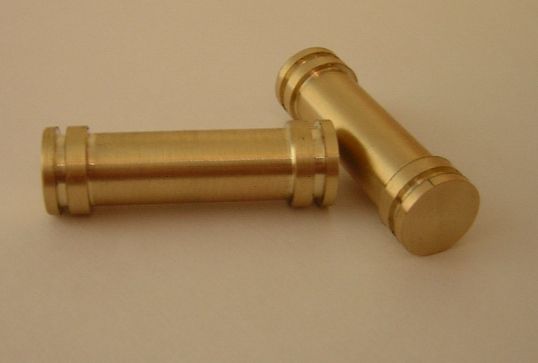
One of the oddball combinations I'm working in is 1/2"n2. To assist with tracklaying efforts, I made up a set of brass roller gauges and a small, 3' wheelbase bogie frame.
The roller gauges were set up for code 100 track and .080" flangeways. In practice, the .080" flangeways are too wide. Despite the fact the scale is relatively large, the wheels that will be employed are bigger HO or medium diameter S scale with an RP25 contour. The gauges will have to be modified for a narrower flangeway.
The wheelsets on the test bogie are Jaybee 36" diameter (HO) with pointed axles. The axles were cut in half and a section of brass tubing was slipped over the stubs to widen the gauge to 1". The frame consists to two flat plate sides with a solid rod spacer at each end fastened with 2-56 screws. The sides are fitted with Markits (Romford) needle bearings for the axles.
The sides were ACC'd together and milled to length. Then the bearing locations were marked, centre drilled, and drilled 5/32". The bearings are held in place with Loctite 242. They slipped into the holes without passing completely through the plate frame. The frame will free-roll down less than a 1% grade.
Motive power for this project will be a 4-wheeled electric trolley with a (non-functioning) pantograph. The chassis will require a 3-point suspension to ensure electrical pickup from the rails.
The roller gauges were set up for code 100 track and .080" flangeways. In practice, the .080" flangeways are too wide. Despite the fact the scale is relatively large, the wheels that will be employed are bigger HO or medium diameter S scale with an RP25 contour. The gauges will have to be modified for a narrower flangeway.
The wheelsets on the test bogie are Jaybee 36" diameter (HO) with pointed axles. The axles were cut in half and a section of brass tubing was slipped over the stubs to widen the gauge to 1". The frame consists to two flat plate sides with a solid rod spacer at each end fastened with 2-56 screws. The sides are fitted with Markits (Romford) needle bearings for the axles.
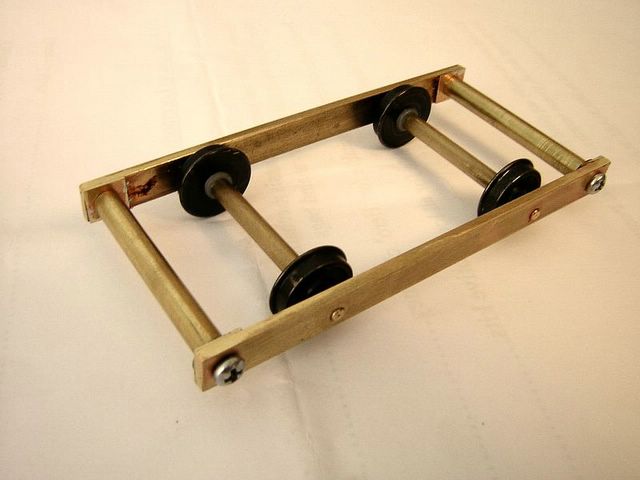
The sides were ACC'd together and milled to length. Then the bearing locations were marked, centre drilled, and drilled 5/32". The bearings are held in place with Loctite 242. They slipped into the holes without passing completely through the plate frame. The frame will free-roll down less than a 1% grade.
Motive power for this project will be a 4-wheeled electric trolley with a (non-functioning) pantograph. The chassis will require a 3-point suspension to ensure electrical pickup from the rails.
Subscribe to:
Posts (Atom)